Rendering in games can be a complex topic, different approaches with their own tradeoffs are available,
new techniques arise, others fall out of fashion…
Studios using in-house engines need to make choices that will fit the type of game they’re aiming for.
It can be very interesting to know which decisions were actually made to ship the final product, what worked and what didn’t.
There are several resources available online detailing game post-mortems, whether it’s
GDC /
Siggraph talks
or even content hosted by game studios themselves.
But not everything is available: public documentation requires time and effort, with little
direct return-on-investment for the studio besides good PR among developers. And that’s when the
company doesn’t simply prohibit employees from disclosing any information publicly.
Below is a collection of frame breakdowns I gathered online (including a few of mines), all written by volunteers and enthusiasts who decided to reverse-engineer some games and document their findings.
Game Release ▼ |
Game Title ▼ |
Link |
Author ▼ |
Published ▼ |
|
|---|---|---|---|---|---|
| 2002/12/13 |

|
Zelda - Wind Waker (GC) | Analysis | by Nathan Gordon | 2016/11/06 |
| 2002/12/13 |
|
Zelda - Wind Waker (GC) | Analysis | by Soenke Seidel | 2012/08/23 |
| 2005/10/18 |

|
Shadow of the Colossus (PS2) | Analysis | by Léna Piquet | 2012/10/07 |
| 2007/02/16 |

|
Supreme Commander | Analysis | by Adrian Courrèges | 2015/06/23 |
| 2009/11/17 |

|
Assassin’s Creed II | Analysis | by Léna Piquet | 2015/12/05 |
| 2011/08/23 |

|
Deus Ex: Human Revolution | Analysis | by Adrian Courrèges | 2015/03/10 |
| 2011/10/18 |

|
Batman: Arkham City | Analysis | by Léna Piquet | 2012/09/21 |
| 2012/02/21 |

|
Syndicate (2012) | Analysis | by Léna Piquet | 2024/01/31 |
| 2013/09/17 |

|
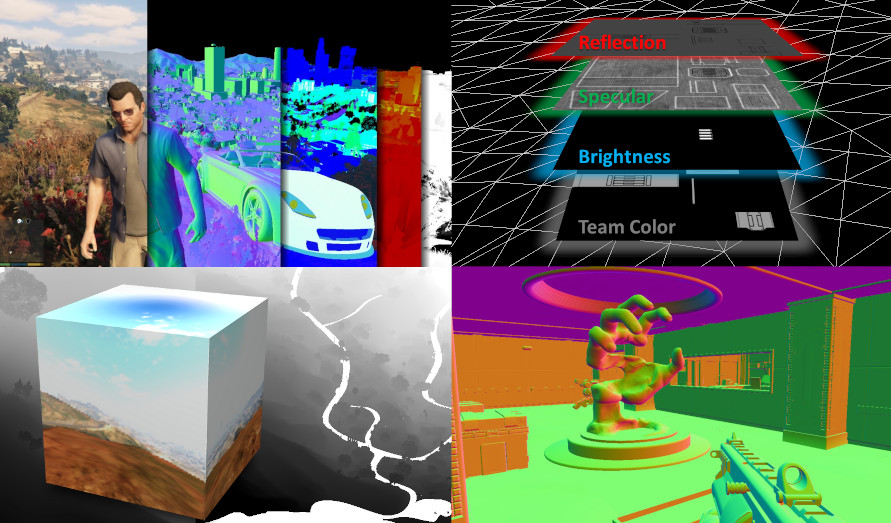
GTA V | Analysis | by Adrian Courrèges | 2015/11/02 |
| 2014/02/25 |

|
Castlevania: Lords of Shadow 2 | Analysis | by Emilio López | 2015/11/28 |
| 2014/09/30 |

|
Middle-earth: Shadow of Mordor | Analysis | by Emilio López | 2017/12/27 |
| 2014/10/06 |

|
Alien Isolation | Analysis | by Gen Afanasev | 2018/01/16 |
| 2015/05/18 |

|
The Witcher 3: Wild Hunt | Analysis | by Mateusz / Astralis | 2017/09/07 |
| 2015/06/23 |

|
Batman: Arkham Knight | Analysis | by Balázs Török | 2020/04/03 |
| 2015/09/01 |

|
Metal Gear Solid V: The Phantom Pain |
Analysis | by Adrian Courrèges | 2017/12/15 |
| 2015/11/10 |

|
Rise of the Tomb Raider | Analysis | by Emilio López | 2018/12/31 |
| 2015/12/16 |

|
Waves 2: Notorious | Analysis | by David Maas | 2022/09/21 |
| 2016/01/26 |

|
The Witness | Analysis | by Thomas Poulet | 2017/08/21 |
| 2016/05/13 |

|
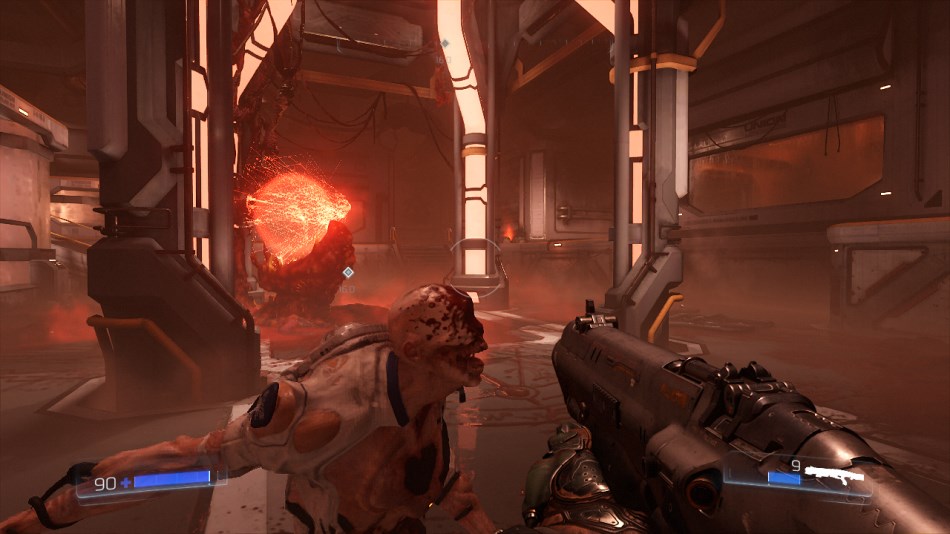
DOOM 2016 | Analysis | by Adrian Courrèges | 2016/09/09 |
| 2016/05/24 |

|
Overwatch | Analysis | by Alain Galvan | 2020/04/13 |
| 2016/12/06 |

|
Shadow Tactics: Blades of the Shogun |
Analysis | by Kosmonaut | 2017/01/09 |
| 2017/08/01 |

|
Slime Rancher | Analysis | by David Maas | 2022/12/07 |
| 2018/05/25 |

|
Detroit: Become Human | Analysis | by M. A. Moniem | 2024/11/27 |
| 2018/06/12 |

|
Jurassic World Evolution | Analysis | by Emilio López | 2021/03/12 |
| 2018/08/01 |

|
Yakuza 0 | Analysis | by Silent | 2019/02/24 |
| 2018/09/14 |

|
Shadow of the Tomb Raider | Analysis | by Balázs Török | 2019/04/19 |
| 2018/10/26 |

|
Red Dead Redemption 2 | Analysis | by Hüseyin | 2020/06/19 |
| 2018/11/07 |

|
Ni No Kuni 2 | Analysis | by Thomas Poulet | 2017/08/21 |
| 2019/01/25 |

|
Resident Evil 2 (Remake) | Analysis | by Anton Schreiner | 2019/08/01 |
| 2019/01/25 |
|
Resident Evil 2 (Remake) | Analysis | by M. A. Moniem | 2022/07/20 |
| 2019/02/15 |

|
Metro Exodus | Analysis | by Balázs Török | 2019/03/27 |
| 2019/02/15 |
|
Metro Exodus | Analysis | by Anton Schreiner | 2019/08/11 |
| 2019/04/23 |

|
Mortal Kombat 11 | Analysis | by Alain Galvan | 2020/04/28 |
| 2019/05/14 |

|
A Plague Tale: Innocence | Analysis | by Balázs Török | 2019/06/16 |
| 2019/08/27 |

|
Control | Analysis | by Alain Galvan | 2021/11/06 |
| 2020/03/20 |
|
DOOM Eternal | Analysis | by Simon Coenen | 2020/08/30 |
| 2020/04/16 |

|
Minecraft RTX | Analysis | by Alain Galvan | 2020/05/19 |
| 2020/07/14 |

|
Death Stranding | Analysis | by M. A. Moniem | 2022/11/30 |
| 2020/09/25 |

|
Mafia: Definitive Edition | Analysis | by Emilio López | 2021/08/23 |
| 2020/12/10 |

|
Cyberpunk 2077 | Analysis | by Hang Zhang | 2020/12/12 |
| 2020/12/10 |
|
Cyberpunk 2077 | Analysis | by Angelo Pesce | 2020/12/17 |
| 2021/05/21 |

|
Knockout City | Analysis | by Ashley Taylor | 2023/12/15 |
| 2022/01/14 |

|
God of War (PC) | Analysis | by M. A. Moniem | 2022/01/18 |
| 2022/02/22 |

|
Elden Ring | Analysis | by M. A. Moniem | 2022/05/25 |
| 2022/04/21 |

|
Teardown | Analysis | by Steven Wittens | 2023/01/24 |
| 2022/04/21 |
|
Teardown | Analysis | by Jake Ryan | 2023/02/20 |
| 2023/06/05 |

|
Diablo IV | Analysis | by M. A. Moniem | 2023/06/28 |
I’ll try to maintain the list updated so if I’m missing something don’t hesitate to reach out.
Keep in mind most of this is the fruit of reverse-engineering and some amount of guess-work can be involved.
For those looking for the ground-truth and more explanation, you can hear it straight from the horse’s mouth:
studios research division (Activision, EA,
Ready At Dawn…),
Siggraph’s Advances in Real-Time Rendering or
GDC Vault talks.
I also recommend Simon Trümpler’s website which presents technical breakdowns of some graphical effects implemented in commercial games.


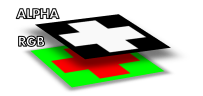
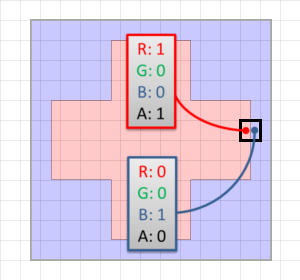
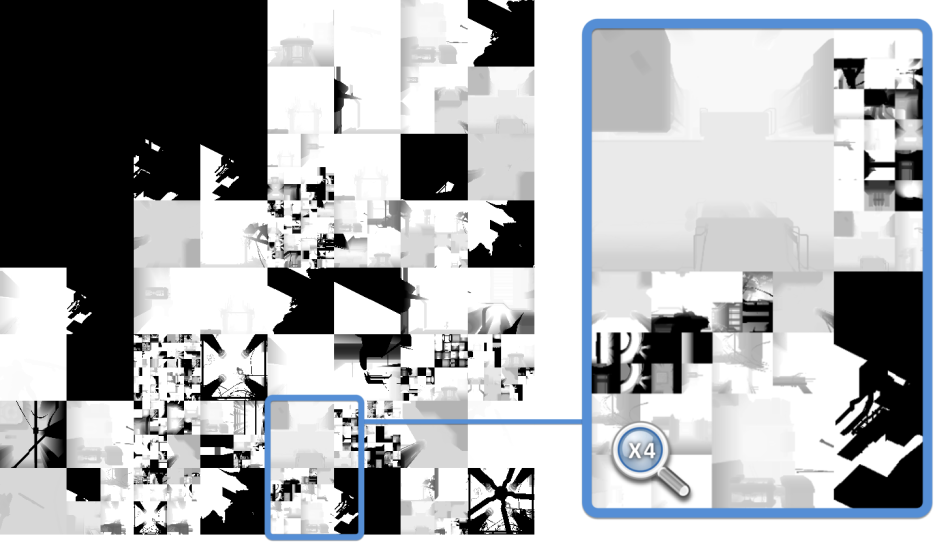
 On the left is a zoomed view, the checkerboard pattern is just here to emphasize the completely transparent area with an alpha of 0.
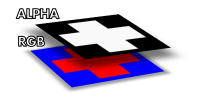