Post Processing Effects
Post-effects are performed once the scene has been rendered, to enhance, fix artifacts, change the mood…
We saw in Part 1 how a few post-effects were applied, like bloom,
anti-aliasing or tone-mapping.
But there are several other effects used in GTA V.
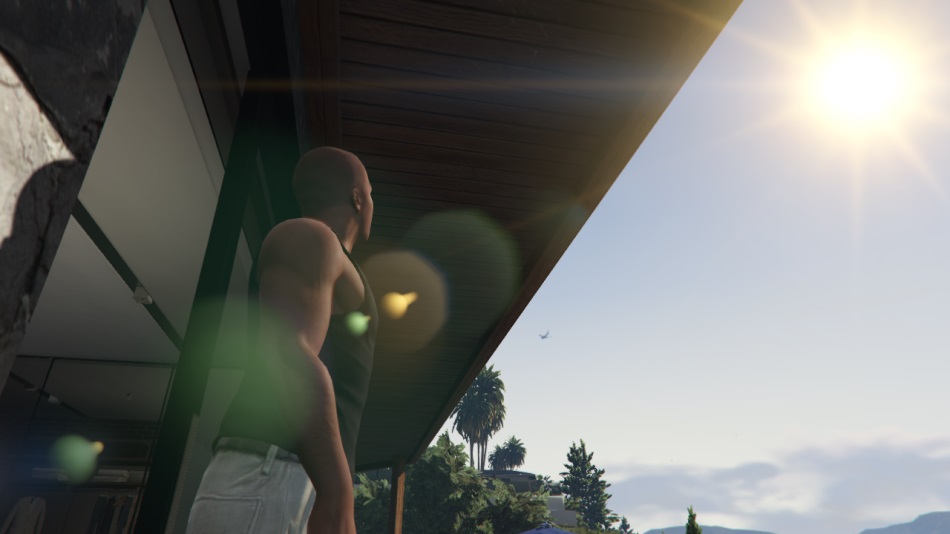
Lens Flares & Light Streaks
When the light goes through a real-world lens, the scattering and internal reflections sometimes cause artifacts.
What I call “lens flares” here is a collection of bright spots along the axis defined by a bright light source and the center of the screen.
There are also “light streaks” which are rays originating from the light source. These artifacts are very common in movies, when they are added
to a game frame they can give a kind of “cinematic” feeling.
There are usually 2 ways to render such artifacts:
- image-based: extracting the brightest areas, duplicating and deforming them. Works for any number of bright light sources.
- sprite-based: adding textured-sprites and managing their positions manually. Each light source must be handled separately but artists can have more control over the artifact shape, color, intensity…
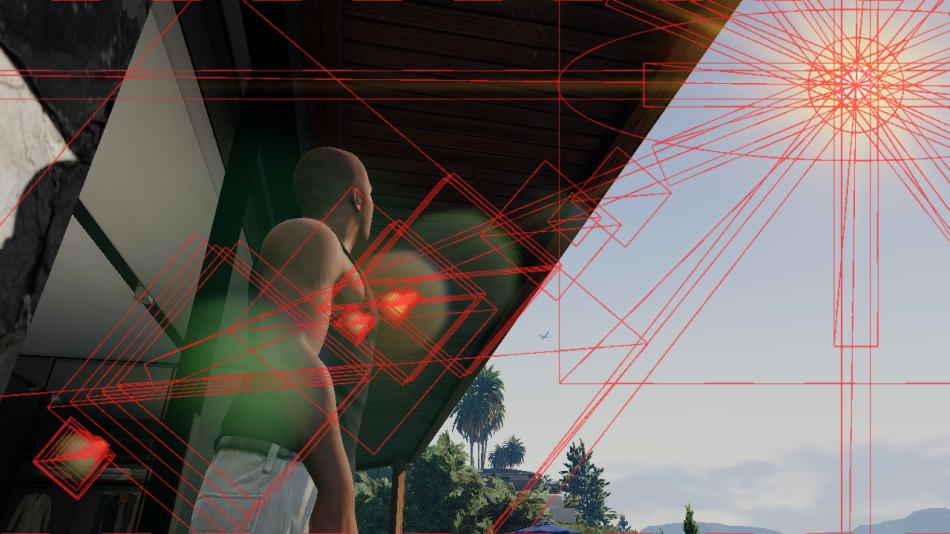
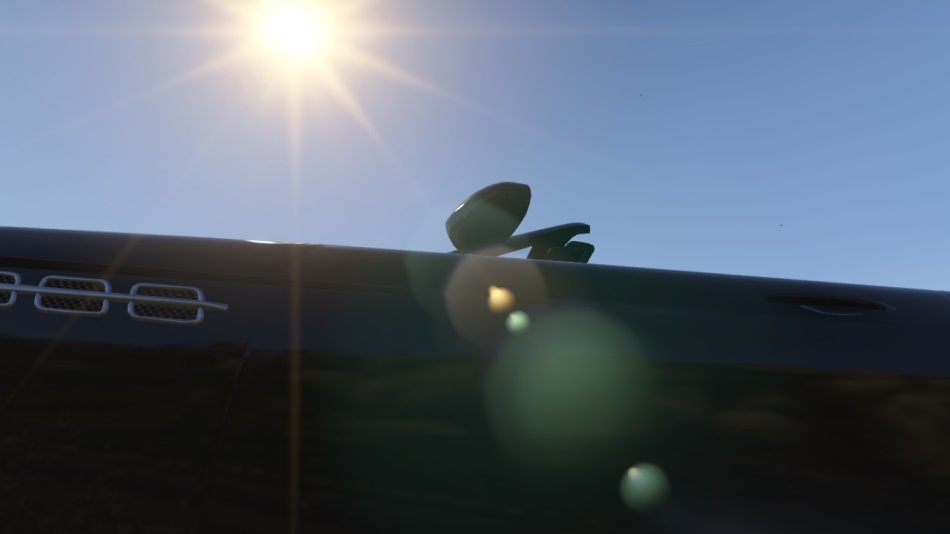
GTA V actually uses both techniques: the image-based approach is used to add a subtle blue halo at the bottom-left corner of the image, it’s actually a symmetric of the bright-pass buffer. But the most visible artifacts in this scene result from the sprite-based approach, it is applied for the sun only. First, light streaks are added by rendering 12 rotated quads centered around the sun. Then for the lens flares, 70 sprites are drawn along the axis “sun – screen center”. Artifacts come closer to each other as the camera points towards the sun.

There are several sprites the engine uses to simulate different lens artifacts:
|
|
|
|
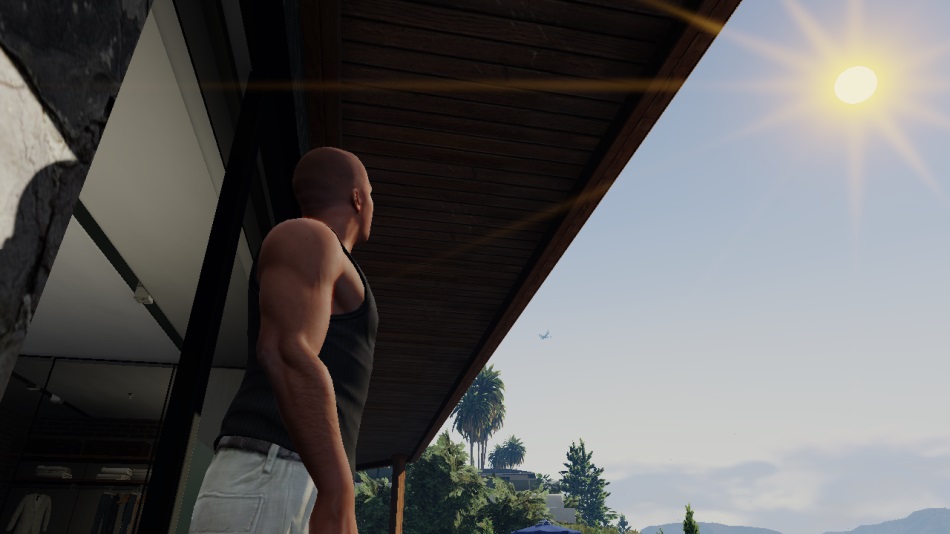
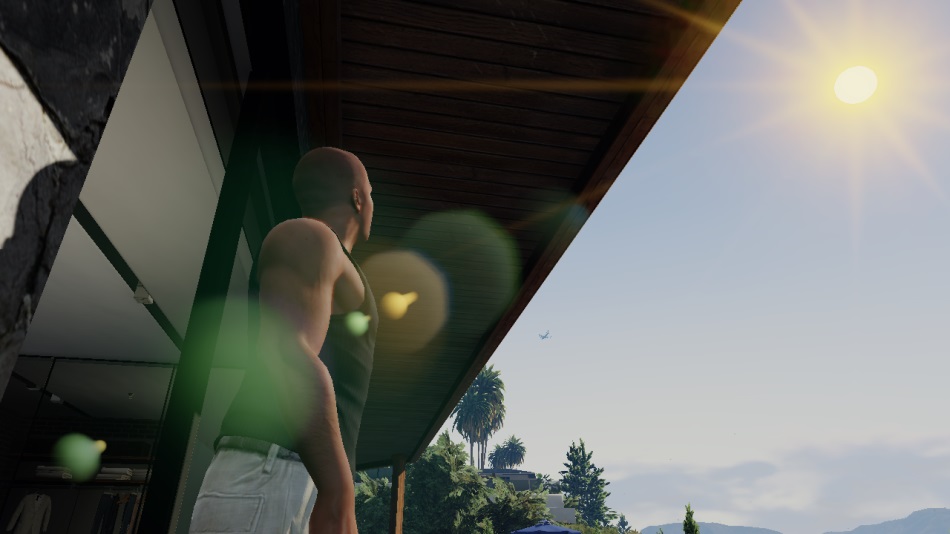
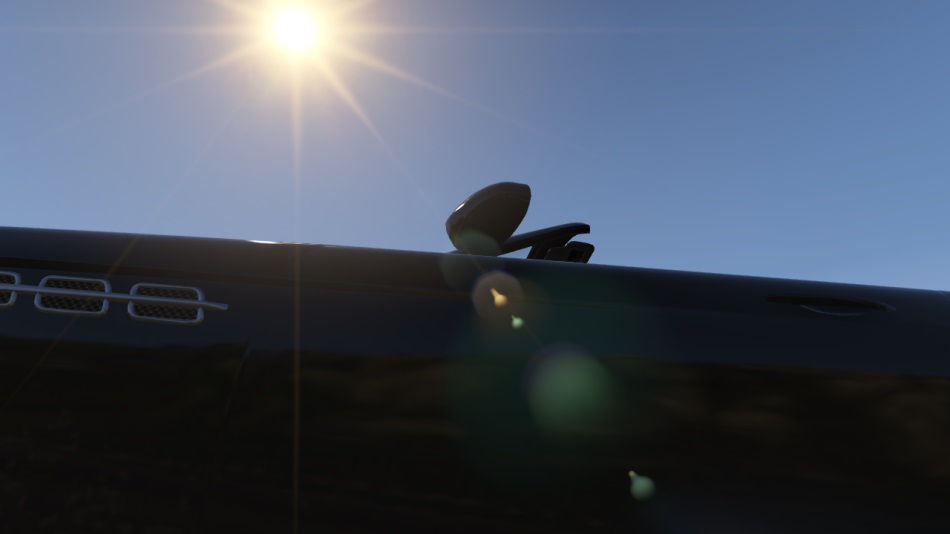
GTA V is all about the attention to details, and lens flares are no exception: their size is proportional to the aperture of the camera. So if you suddenly look towards the sun, the lens flares are big
at first, but then as the aperture narrows to lower the exposure the lens flares become smaller too. The animation below illustrates the phenomenon.
Another nice detail: if you switch to the first-person view, there are barely any lens-flares visible, because we are now seeing through human eyes, not through a camera anymore.
Anamorphic Lenses
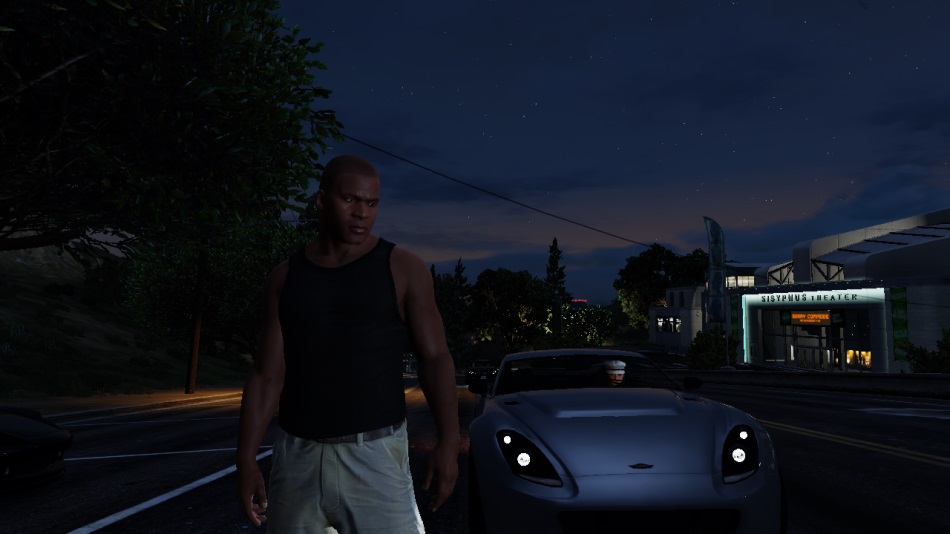
Especially at night of for dark areas, the game simulates the artifacts of anamorphic lenses: long vertical or horizontal streaks, usually blue.
Light streaks resulting from anamorphic lenses got really popular recently, with Hollywood (ab)using them in the latest science-fiction movies.
Here the effect is achieved using sprites, exactly like for the sun rays we saw previously, it is applied only on very bright sources like car headlights directly facing the camera.

Depth of Field
The scene below would look a little bit “artificial” if you were to see it in a movie, everything appears very sharp and crisp whereas in a movie you would expect the scenery in the background to be out-of-focus and look blurry.
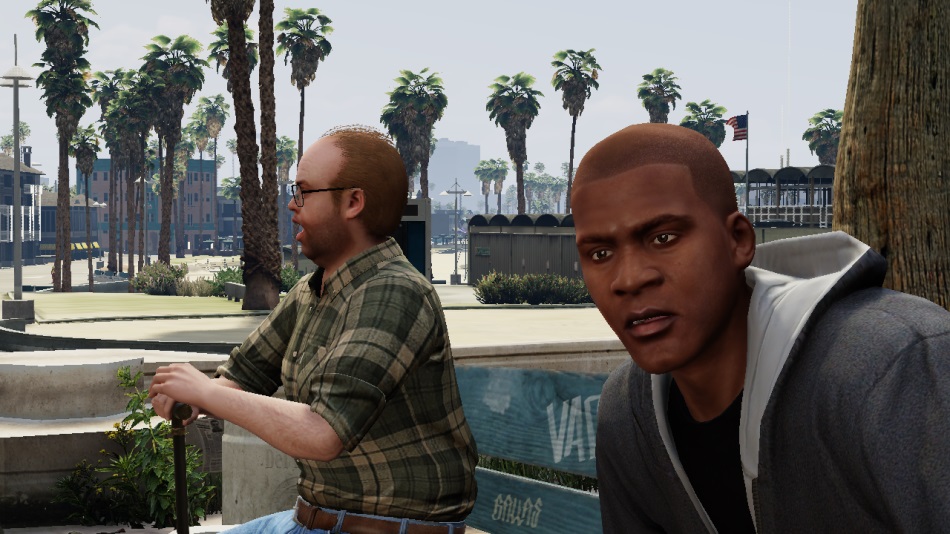
This is what the Depth of Field effect (DoF) is supposed to solve, by blurring out the areas of the image which are not in focus.
How is it applied? First a Circle of Confusion map (CoC map) is generated from the depth buffer.
This tells us how much “out-of-focus” each pixel is, in other words how much “blurring” a pixel should receive. The CoC value of a pixel is solely dependent on
its distance from the camera (so its depth) and the camera lens parameters.
Note though that GTA V stores the CoC as a signed value, meaning it varies between -1 and 1. The sign simply tells if the pixel is in front of or behind the in-focus area. For example pixels very far away and out-of-focus have a CoC of 1, pixels very close to the camera, out-of-focus, have a value of -1. Any value close to 0 means very little to no blurring.
Why is a signed value needed?
Because creating a good DoF is tricky, there are many cases to consider when you apply a “blur” to your scene.
For example you don’t want a pixel out-of-focus in the background to bleed into a pixel in-focus in front of it. But now if you consider an out-of-focus pixel in the foreground, it’s the opposite:
you want it to bleed into the in-focus pixels located behind it. So when it comes to blurring a pixel, it’s not simply a question of “how much to blur”, you also need
to take into account whether the neighbor pixels are in-front or behind, in-focus or out-of-focus… Hence the signed value to be able to distinguish the different cases.
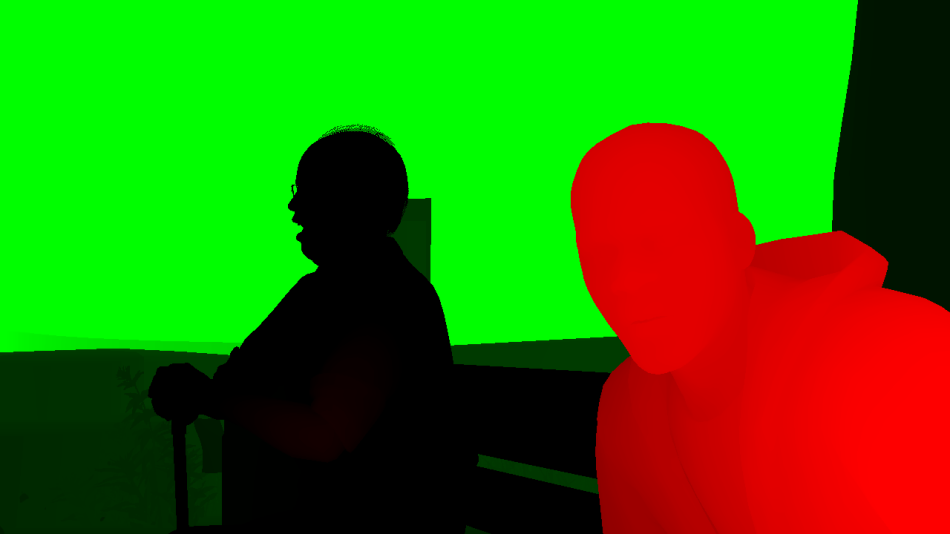
In the CoC map below I used the green channel for CoC > 0 and the red channel for CoC < 0 so you can visualize better.
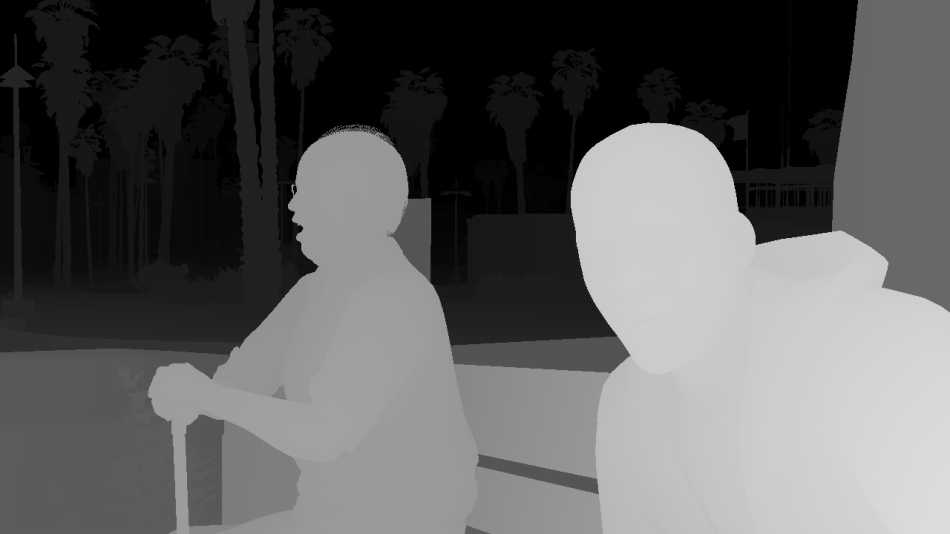
Depth Map
|
|
CoC Map
|
So by the look of the CoC map we can know Lester in black is supposed to be in-focus, while Franklin in the front and the scenery in the back should be out-of-focus.

Then the engine extracts just the “front out-of-focus area”: all the texels with a CoC < 0. This front CoC map is then blurred by a compute shader, using an horizontal pass followed by a vertical one.
What’s the reason behind this? Well, Franklin’s pixels have a CoC strength of about 0.7, while the bench right behind him is in focus with a CoC of 0. Now when the blur is performed,
Franklin will look really blurry, but the bench will remain very sharp, the area near Franklin’s right arm will look weird: you will have an abrupt change from strongly blurred arms pixel to suddenly sharp
bench pixels. A hard silhouette quite easy to notice… This should not happen, the silhouette should be smooth, Franklin’s pixels should bleed into the surrounding pixels.
This is what this blurred CoC map is supposed to achieve: smooth out the CoC map discontinuities to enable the bleeding of the “front out-of-focus area”.
Now we have all we need to compute the depth of field. Historically blurs are computed at a lower resolution by a pixel shader, separated in a horizontal and vertical pass to optimize the computation. Here GTA V keeps the 2-pass approach but works at the original resolution and, to avoid crushing the performance, use a compute shader instead of a pixel shader. It makes sense because compute shaders can be particularly adapted for computing large-kernel blurs. When computing the final “blurred” value of a pixel, the color will be influenced by a smaller or larger number of neighbor pixels (depending on the pixel’s CoC) and certain neighbors might be excluded if they lead to incorrect bleeding.
|
Base
|
Depth
|
CoC
|
Blurred Front CoC
|

This effect gives a whole other dimension to the frame, like in a movie when the director would keep in focus a character to draw attention to him.
Conclusion
There are still many other post-processing effects we could talk about but this series of posts about GTA V has already become way longer than I originally planned.
There are heat haze, god rays (sometimes in screen-space by making bright areas bleed, other times added manually
inside the scene as meshes),
or motion blur (seems to be a hybrid approach, with a special pass doing a directional blur based only on the camera rotation direction
excluding the player pixels thanks the stencil buffer acting like a mask).
The “Wasted” screen when your character dies is also pure post-process: after the scene is rendered normally it is blurred, turned into grayscale,
then vignetting and film grain are added and finally the text is drawn on top of it.
Well I hope I could shed some light on how the very secretive Rockstar managed to create a title considered by many as a landmark in the video game history. Its vast universe, its immersion and attention to details plus the fact Rockstar managed to make it run on the old generation of consoles make GTA V a really amazing title.
Links
- The tech that built an empire: how Rockstar created the world of GTA 5 featuring an interview of Aaron Garbut.
- GTA V NVIDIA Performance Guide with details about the different graphics settings.
- Renderdoc which made picking into GTA V internals a breeze.
More discussion on this very topic: Slashdot, Hacker News, Reddit, John Carmack on Twitter.