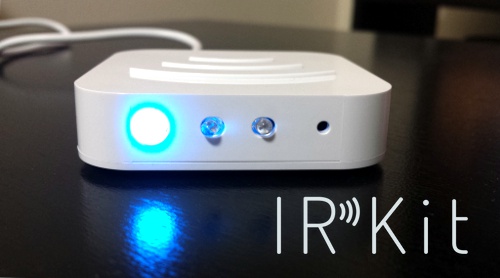
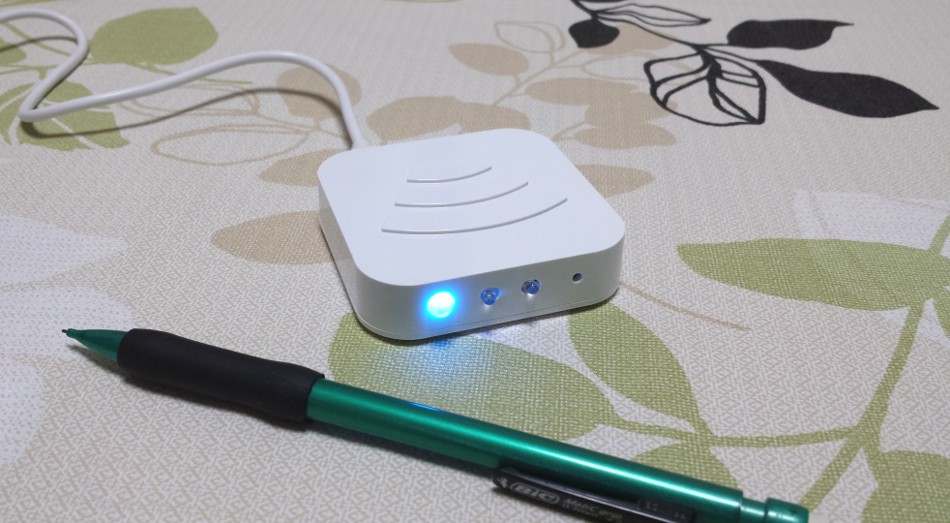
Recently I got my hands on an IRKit device. It’s a pretty neat tool to control several devices remotely by sending IR signals. I use it to control my TV, air-conditioning, light, sound system…
It is fairly cheap compared to the competition (65$ on Amazon Japan), and one strong point is it is completely open-source: you can play with the firmware, customize it any way you want…
What is IRKit exactly?
It’s basically an Arduino board, with a wifi module and some IR receiver and transmitter.
The device is low-consumption and is powered through a micro-USB connection, just like a smartphone.
It’s very tiny and fits anywhere: a 6cm x 6cm square, 1.5cm tall.
It connects to your wifi network and runs its own web-server listening to your commands. All the communication with IRKit is done through HTTP requests, which makes it super-easy to send commands directly from a web-browser.

The official website talks mainly about iOS clients, but don’t worry, any platform supporting a web-browser can be used: Android, Linux, Windows are perfectly fine.
The device also supports control from the cloud: you can send commands from outside your home, they will be relayed through the IRKit servers.
How do I read/send IR signals with IRKit?
You first ask your IRKit to read an IR signal. For example, you point your TV remote at IRKit and press a button, IRKit will automatically pick-up the signal.
Then you can retrieve the IR data by making a simple GET request.
For example:
$ curl -i "http://192.168.11.30/messages"
HTTP/1.0 200 OK
Access-Control-Allow-Origin: *
Server: IRKit/__VERSION__
Content-Type: text/plain

{"format":"raw","freq":38,"data":[18031,8755,1190,1037,1190,1037,1190,1037,1190,1037,1190,1037,1190,1037,1190,1037,1190,1037,1190,3228,1232,3228]}
When you want to send a command, you just ask IRKit to replay the IR data.
This is done by sending a POST request, for example:
curl -i "http://192.168.11.30/messages" -d '{"format":"raw","freq":38,"data":[18031,8755,1190,1037,1190,1037,1190,1037,1190,1037,1190,1037,1190,1037,1190,1037,1190,1037,1190,3228,1232,3228]}'
HTTP/1.0 200 OK
Access-Control-Allow-Origin: *
Server: IRKit/__VERSION__
Content-Type: text/plain
The API is very simple and nice to use.
The logic is completely client-side: IRKit is just a “dumb” state-less transmitter.
So you could build your own automation system that dispatch commands to automatically turn on some equipment at some time of the day.
How do I initialize it?
When you receive your IRKit, it doesn’t know about your home wifi.
There is first a phase of setup during which the device exposes its own wifi network.
By connecting to the device wifi network, you can provide the credential so the device can join your home network.
It’s a process a bit complex since it involves getting some API key from the IRKit servers,
obtaining a security token for the device, sending your home wifi login details in some serialized format.
Quite tedious by hand…
The official way (iOS)
The official website mentions iOS support only: you can download an app from the App-Store, follow the steps and it will setup IRKit for you.
What if I don’t have any iOS device?
I tried a few other alternatives:
- IRKitJS: it’s browser-based, so multiplatform, unfortunately it failed silently during the last step for me.
- IRKit Controller Free it actually works pretty well, but it’s only available on the latest Android versions, if you have an old terminal you’re out of luck.
Note that you need an understanding of Japanese to use both of these solutions, there’s no English version.
My solution
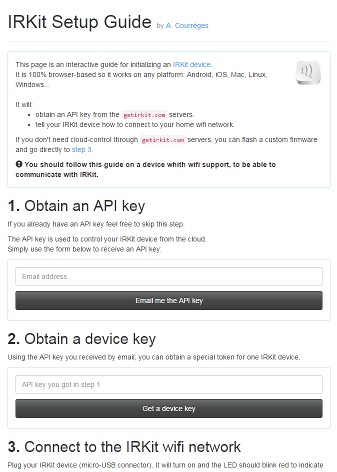
In the end, since I wasn’t satisfied with any of the solutions, I came up with my own initialization system: a single HTML page dispatching HTTP requests through Javascript.
It’s a step-by-step interactive guide, telling you what’s happening at each stage.
And since it’s web-based it works on any platform.
Try it here:
>> IRKit English Setup Interactive Guide: Android, iOS, Linux, MacOS, Windows <<
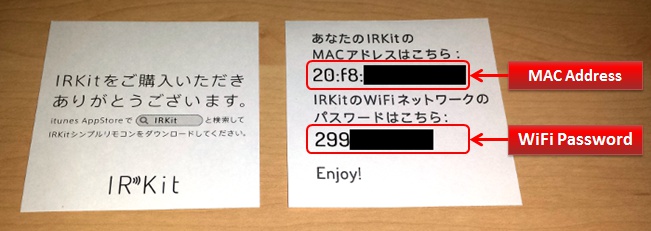
Note: my guide is in English, but you’ll still need to get the default password for your device. It is written in Japanese on a small piece of paper included in the IRKit box:
And you don’t have to trust my server: if you have doubt you can save the HTML document and run it locally, the JS code is all available under a MIT license anyway.
What next?
Your device is operational? Great! You can now record all the IR signals you wish.
To organize them, give a try to IRKit Web Remote, a solution I came up with.


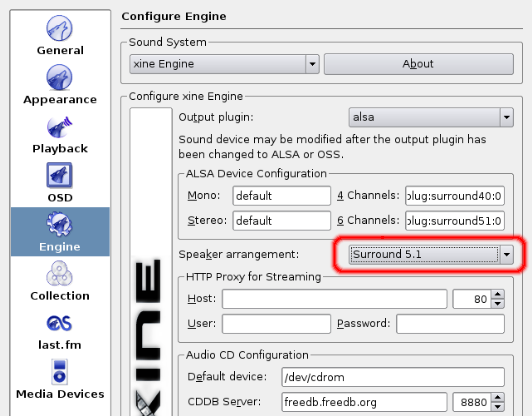
 When I migrated one of my desktops from Windows XP to Ubuntu Feisty (7.04), my 5.1 speakers that were working really great with XP were now only outputting in 2.1 mode.
Prejudices about the lack of hardware support by Linux didn’t really encourage me to look into the issue.
When I migrated one of my desktops from Windows XP to Ubuntu Feisty (7.04), my 5.1 speakers that were working really great with XP were now only outputting in 2.1 mode.
Prejudices about the lack of hardware support by Linux didn’t really encourage me to look into the issue.